Post Processing for FDM Parts: A Complete Guide
FDM is a recognized and frequently utilized 3D printing workflow that aims at rapid prototyping and the production of functional parts and complicated topologies. Nevertheless, FDM parts are usually characterized by rather coarse surfaces and sometimes lower mechanical properties. That is why the parts’ further processing is often needed to make the parts’ surface smooth, their strength increased, or the details on the parts’ surface more exquisite. After processing the desired design is obtained but to maximize its functionality and aesthetics post-processing is inevitable. In this article, We’ll explain when and which post-processing techniques are employed as post-processing for FDM Parts.
What is Post Processing for FDM Parts?
Post Processing means the process is done on the printed part to improve the part quality, change the mechanical properties, or even adapt the intended part size. As for the disadvantages of FDM printing; many parts appear with distinct layer lines, surfaces are rather rough or the process requires additional steps after the printing is completed. For instance, frequently used support structure removal and sanding. These processes make the part ready for utility or appearance. The ultimate purpose of printing is to produce a part that is of a certain quality and finish as it fits the intended application.
1. Support Removal
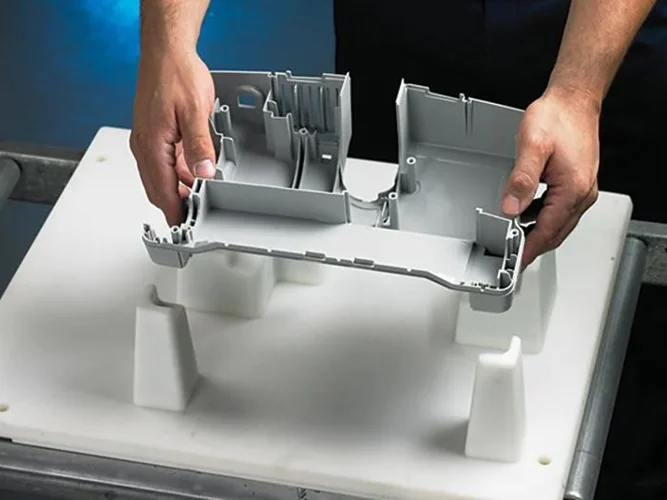
FDM prints often come out with overhangs needing support structures particularly where small intricate shapes are in the design. However, such support must be taken away after printing has been done. The complexity of this task is determined by the type of material to be supported and the part geometry.
- Manual Removal: Self-remove support structures are easy to remove. You can hand remove them with the help of pliers, cutters, etc. Be careful not to damage the part.
- Chemical Dissolution: Some support materials, such as PVA (polyvinyl alcohol), are water. This step will make the support material dissolve when the part is soaked in warm water leaving the part clean.
- Heat Treatment: Auxiliary materials such as HIPS (High Impact Polystyrene) melt in limonene.
The support removal method is beneficial for parts produced using materials that need soluble supports. FDM part support increases the optimal detachment of support structures from the built part. The remaining support structures will bear an impact on the surface finish and the shape of the final part.
2. Sanding and Smoothing
Most FDM parts are smooth and comprise visible layer lines making the textures rough when touched. Sanding and smoothing are two post-processing techniques meant for eliminating such lines to increase surface finish.
- Manual Sanding: Start by using the relatively rough sandpaper (between 100 and 200 grits), and then progressively fine the surface between 600 to 1000 grit. Pulse in circular ways to avoid a groove that is seen.
- Abrasive Blasting: For large batches, on the other hand, abrasive blasting can finish the part faster. Small glass beads or sand are used to provide the required evenness of the surface.
- Chemical Smoothing: Acetone vapor smoothing is optimum to be used for materials such as ABS. The vapor makes the surface layer less rigid so that it can be easier to flatten. This leads to a smoother surface and gives less effect of layering on the tubes as seen in the previous technique.
Therefore, it’s important to sand or smooth your FDM parts for both form and function. A smoother surface gives the part the right outlook while improving the compatibility with other parts, simultaneously.
3. Polishing and Painting
Sanding or smoothing is usually followed by the application of some finishing that can improve the part’s outlook. Sandpaper and paintwork can use a glossy finish.
- Polishing: After the part has been satisfactorily sanded, rub some polishing compound on it with a soft clean cloth or a buffing wheel. This process gives the surface a certain luster.
- Painting: Use the primer before putting on paint after the surface has been polished. Select aerosol paints meant for plastic since they paint uniformly and look perfect. Instead of applying one thick coat, which tends to drip, apply individual thin layers of light.
For the functional part, select paints that do not have a detrimental effect on the properties of the part like flexibility and heat resistance.
4. Annealing
Annealing is a heat treatment that has the potential to increase the mechanical properties of FDM parts, mainly ABS, PLA, and Nylon. You can also reduce inner stress as well as maximize a part’s strength and heat endurance simply by heating the part to a particular temperature that is not too high to make the part melt.
- Heating: Put the part into an oven and bake it at a temperature; slightly higher than the usual processing temperature, but below the melting temperature of the material (generally between 80 and 120 C). Make sure that the heat is uniform over the surface of the part.
- Cooling: After achieving the required temperature, a cooling rate should be maintained gradually. This gradual cooling minimizes warping and provides for uniform mechanical properties throughout the part.
When the component is applied under load-bearing conditions or is subjected to high thermal loads. There is also less amount of warping hence increasing the stability of the final part of the component.
5. Filling and Painting
Quite often, your FDM part can have some minor defects, such as the presence of voids, undercuts, or rough surfaces. Sealing these defects before painting is imperative as a post-processing job.
- Filling: To control any vibrations or noises, sinks, gaps, cracks or holes should be sealed by an epoxy putty or plastic filler. Spread the filler to the part required to smooth the surface with the spatula and let the part cure before moving to the next stage.
- Sanding: After that time remove the filler and sand it with the fine-grit sandpaper until it becomes smooth. This step helps to make the filler sit flat on the rest of the part in a corresponding manner.
- Painting: The next step is to paint after filling the holes and sanding the surface to get the desired finish. It’s recommended to use the primer first and then apply multiple layers of your favorite color of paint.
Filling and painting are carried out when parts call for beautiful looks or a specific color or finish as needed for identification.
6. Assembly and Joining
In some occasions where the particular part is typically large enough that it cannot be printed in a single build, post-processing may consist of assembly and joining. It frequently consists of joining parts using fasteners or adhesives.
- Gluing: There are various types of adhesives ranging from ordinary glue to superglue, epoxy, or plastic-specific cement, and used to join the parts together. Ensure that you choose the adhesive that is compatible with the type of materials you wish to use.
- Screws and Fasteners: For parts that need to be disassembled or require more mechanical strength, use screws, bolts, or other mechanical fasteners. Make proper pilot holes to drill and make appropriate holes where necessary before you assemble.
- FDM Welding: Several materials such as ABS can be bonded by heat to act as the medium of joining them together. The process comprises heating of the part edges before bending them together to join the parts.
7. Tapping and Threading
FDM parts that require joining using bolts or screws will likely call for tapping or threading. Tapping produces internal threads that enable the use of screwed fasteners to be screwed in place.
- Tapping: Thread the inside of the part using a tap set. Select a specific tap, required thread size, and pitch for the screw or bolt to be used.
- Thread Cutting: External thread cutting means you have to employ a die or another tool to create threads on the external surface of the part fabricated.
Tapping and threading are central where the component is assembled with thread-mounted hardware or where screw mating needs to be achieved.
Conclusion
Post-processing is an essential step to enhance the quality and functionality of FDM parts. Whether you’re improving surface finishes, increasing strength, or ensuring a perfect fit, applying the right techniques will lead to superior results. From support removal to sanding, smoothing, and even painting, each step contributes to a higher-quality final product.
At Print My Parts, we understand the importance of post-processing in achieving precise and professional results. Our expertise in post-processing techniques ensures that your FDM parts meet both aesthetic and functional standards. Let us help you refine your parts for any application, whether it’s for prototyping or final production.

